Connecting a Custom Domain
Connect your inblog-powered blog using a subdomain (e.g., blog.example.com) or subdirectory (e.g., example.com/blog), with guidance on DNS configuration.
Overview
The domain setup section may require developer assistance, particularly for DNS configuration or code implementation. Technical support sessions are available if needed.
You can connect your inblog-powered blog using one of two approaches:
- Subdomain (e.g.,
blog.example.com) - Subdirectory (e.g.,
example.com/blog)
Where to add DNS records: DNS settings must be added where your domain is managed (e.g., Namecheap, GoDaddy, Cloudflare), not where your website is built (e.g., Webflow, Framer). If you built your site on Webflow but purchased your domain through GoDaddy, add the DNS records in GoDaddy.
Subdomain Setup
In the Custom Domain settings, select Subdomain and enter your desired subdomain.
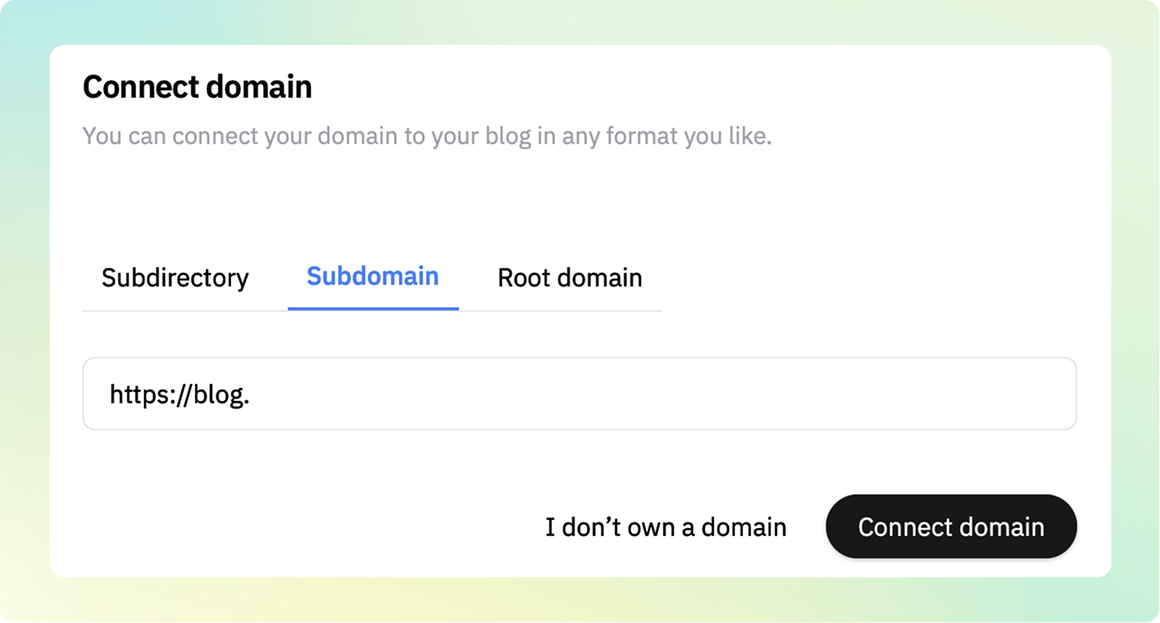
Click Start connection to receive DNS configuration instructions. Update DNS settings through your domain provider, and your subdomain will connect within 5 minutes.
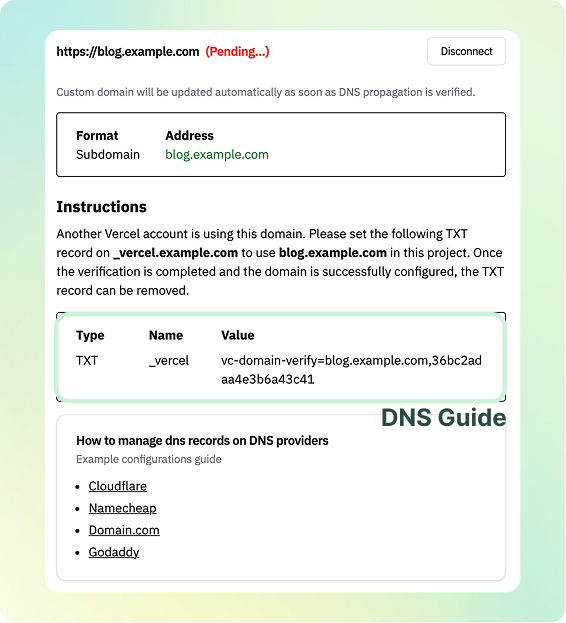
If your DNS provider rejects the CNAME value: some providers (e.g., Gabia) require the value to be a fully qualified domain name and show an error such as "the value must end with a dot (
.)". In that case, add a trailing dot to the exact value inblog gave you. For example, if inblog showsabc123.vercel-dns-016.com, enterabc123.vercel-dns-016.com.. Other providers (e.g., Imweb) expect the value without the trailing dot. Follow the format your provider asks for.
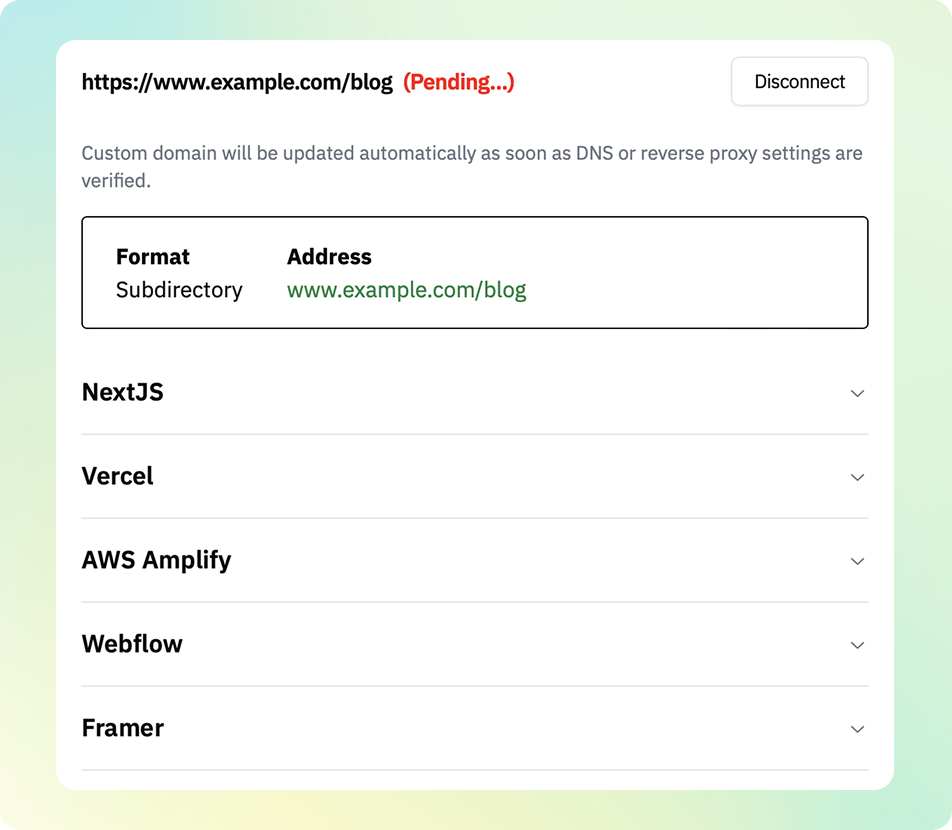
Subdirectory (Sub-folder) Setup
"Subdirectory connection is currently supported only for websites built with Next.js, Vercel, AWS Amplify, Framer, and Webflow."
Supported platforms include:
- Next.js: Supported, except for static export
- Vercel / AWS Amplify: Supported as hosting platforms
- Framer / Webflow: Supported via reverse proxy using Cloudflare
Select Subdirectory in the Custom Domain settings and enter your domain (e.g., example.com/blog). Click Start connection for the full setup guide. Note that subdirectory setup typically requires code implementation.
AWS CloudFront Subdirectory Setup
To configure inblog in a sub-directory using AWS CloudFront, check the following setup steps.
- Use the distribution that serves your main website, or create a new distribution if CloudFront is not configured yet.
- Set Distribution name to
inblog proxyand Domain toexample.com. - Set Origin type to
Other, Custom origin toproxy.inblog.dev, and Origin path to/{subdomain}. - Set the origin request policy to
Managed-AllViewerExceptHostHeaderso CloudFront does not forward the viewerHostheader toproxy.inblog.dev. - Create a CloudFront Function for URI rewriting and paste the following code.
function handler(event) {
  var request = event.request;
  var uri = request.uri;
  var basePath = "/blog";

  if (basePath === "/") {
    return request;
  }

  if (uri === basePath) {
    request.uri = "/";
    return request;
  }

  if (uri === basePath + "/") {
    request.uri = "/";
    return request;
  }

  if (uri.startsWith(basePath + "/")) {
    request.uri = uri.substring(basePath.length);
    return request;
  }

  return request;
}
- Add behaviors for
/blog,/blog/*, and/robots.txt. - Publish the function to
Live, then attach it to theViewer requestevent for all three behaviors.
After deployment, verify the following URLs from your terminal.
curl -I https://example.com/blog
curl -I https://example.com/robots.txt
Subdirectory and Google Search Console
When you connect a subdirectory (e.g., example.com/blog), your blog traffic is included under the existing root domain Search Console property. If you want to analyze blog-only data separately, you can add an additional URL-prefix property:
- Property type: URL prefix
- URL:
https://example.com/blog
This separate property also requires its own HTML tag verification. Add the meta tag for this property in the inblog dashboard under Design tab → Advanced settings (Code injection).
What does "Not Verified" mean?
After adding DNS records, the domain status in the inblog dashboard may show "Not Verified". This means inblog has not yet confirmed your DNS records. Common reasons:
- The DNS records haven't been added yet, or the values are incorrect.
- DNS propagation takes up to 24–48 hours after changes are made.
Once the status changes to "Verified", DNS confirmation is complete. The domain may take a few more minutes to become fully accessible.
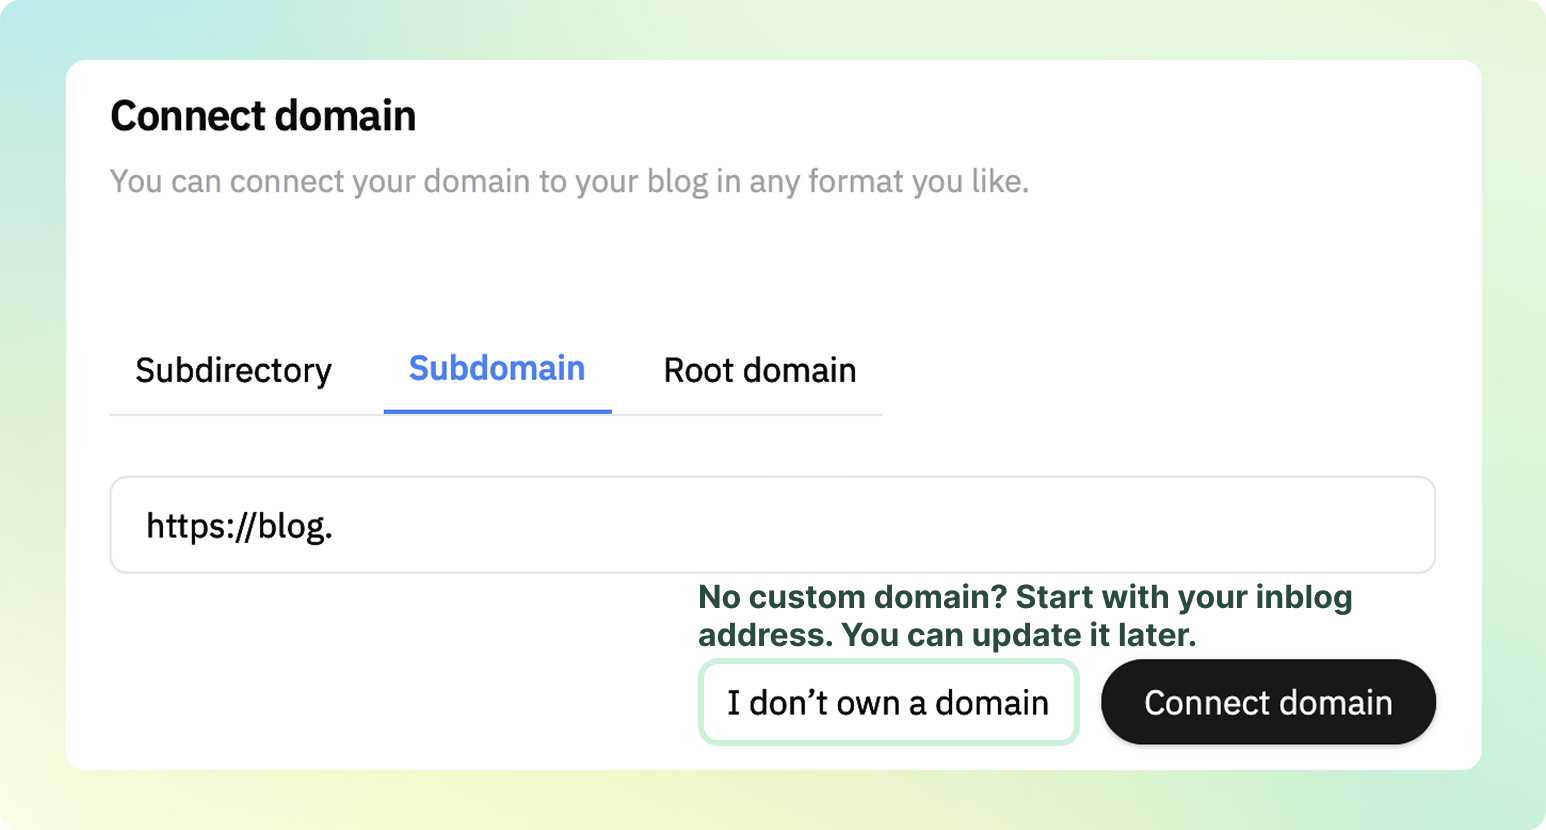
No Domain? No Problem.
If you lack a custom domain, continue using the default blog domain (e.g., example.inblog.io) by selecting the "I don't own a domain" option during setup. You can upgrade to a custom domain at any time.
How do I add a "Blog" tab to my main website's navigation?
inblog does not control your main website's navigation menu. To add a blog link, update the navigation in the tool used to build your main site (e.g., Webflow, Framer, WordPress, or your CMS).
Use your inblog blog address as the link target:
- Subdomain:
https://blog.example.com - Subdirectory:
https://example.com/blog
Before connecting a custom domain, you can temporarily use the default inblog domain, e.g.,
https://example.inblog.io.
How do I make the blog header logo link back to my main website?
In the inblog dashboard, go to Design tab → Header. There you can set the logo image and the URL visitors are taken to when they click it. Enter your main website URL to redirect visitors to your homepage.
Last updated 2026-07-23