
Managing Team Members
Manage your personal profile, invite teammates, and control role-based access to your blog dashboard.
My Profile Settings
Click your profile icon in the top-right corner to access your personal settings.
You can update the following:
- Author name — displayed on published posts
- Profile image — displayed on published posts
- Password
Want to hide your real name? Set your Author name to a nickname or brand name — this is what readers will see on all published posts, both new and existing.
Can I add an author bio?
Personal profile settings currently do not include a built-in field for entering and saving a bio. To introduce yourself to readers, you can manually add an “About the author” paragraph to a post's body. That paragraph appears only in that post and is not automatically linked to your author profile.
Adding Team Members
To invite teammates:
- Click Team in the left sidebar.
- Click Add member in the top-right corner.
- Enter their email address to send an invitation.
- Invitations are valid for 7 days.
- Once accepted, new members will appear in the team list.
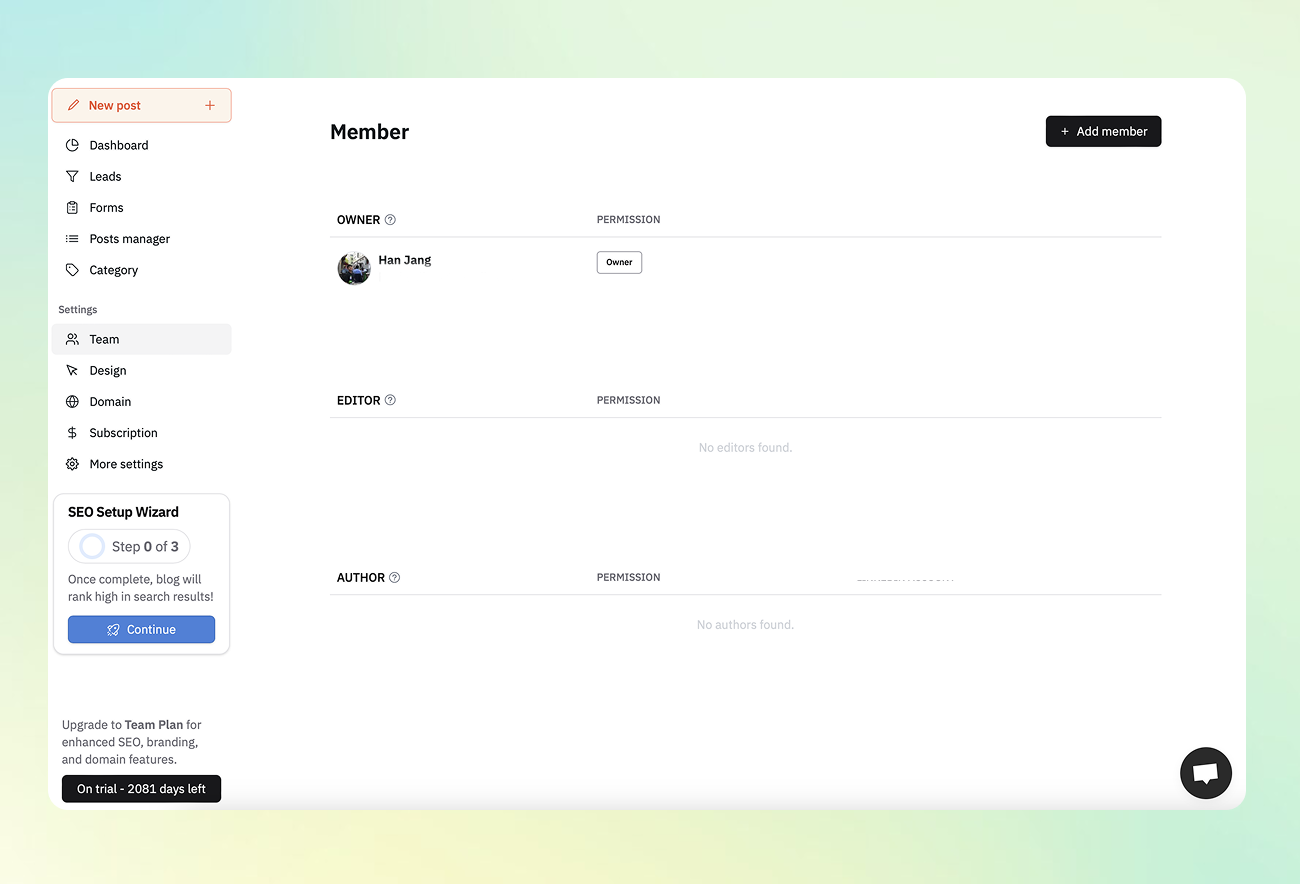
Roles & Permissions
-
Owner
- Full administrative access to all blog settings
- Can invite/remove members and change roles
- Only one Owner per blog
-
Admin
- Can manage billing, content, blog settings, and every member except the Owner
- Cannot change the Owner's role, transfer ownership, or delete the blog — those are Owner-only
-
Editor
- Can manage most blog settings except deleting the blog and managing members
- Can edit, publish, and delete any post
- Must be granted permissions by an Owner or Admin
-
Author (Recommended for freelancers)
- Can only create, edit, or delete their assigned posts
- Can be granted dashboard access by an Owner or Admin
Invitation Email Didn't Arrive
If your teammate never received the invitation, check these in order:
- Ask them to check their spam and promotions folders.
- On the Team screen, confirm their email is still listed under Invited. If they already accepted, they move out of that list and into the member list.
- Click Resend on that row to send the invitation email again. If more than 7 days have passed, the row is marked (Expired) and the button reads Renew — use it the same way to issue a fresh invitation.
Resend and Renew are only visible to Owners and Admins. Editor and Author accounts can't re-send invitations, so sign in with an Owner or Admin account.
Resending invalidates the previous link. A new invitation link is issued, so your teammate must accept using the most recently received email. If you invited them to more than one blog, resend for each blog separately.
If the email still doesn't arrive after resending, send us the recipient's email address and the time you resent over chat, and we'll check whether the delivery step failed at that time.
Re-opening the Invitation Link Shows Invalid Invitation
An invitation link can only be used once. Opening a link you already accepted shows this screen:
- Heading:
Invalid Invitation - Body:
Invitation is invalid or no longer available. Ask the blog owner or an admin to resend it.
That screen does not distinguish between already accepted, expired, revoked, and superseded by a resend. Even within the 7-day window, an invitation you already accepted produces the same wording — which easily reads as "it hasn't expired, so why isn't my account activated?" The invitation email frames the link as activating your account, so this is often mistaken for an account problem. The screen is about the invitation link, not about your account.
How to confirm your invitation was already accepted
- Ask the person who invited you (an Owner or Admin) to check the Team screen the same way as step 2 of Invitation Email Didn't Arrive above.
- Skip the invitation link and go straight to the dashboard:
https://inblog.ai/dashboard/{blog-address}. - Confirm you are signed in with the same account you accepted the invitation with. Signed in as a different account, the blog will not appear in your list — see Frequently Asked Questions on checking which account you're in.
The screen shown right after accepting says Invitation accepted and Your membership is ready. Sign in to open the blog dashboard., and its Sign in button takes you through the sign-in screen to that same dashboard.
If the blog still isn't in your dashboard list, your browser may be showing a previously cached list — refresh the page.
The invitation email and the invitation screens are always in English, regardless of your language setting.
Changing Team Member Permissions
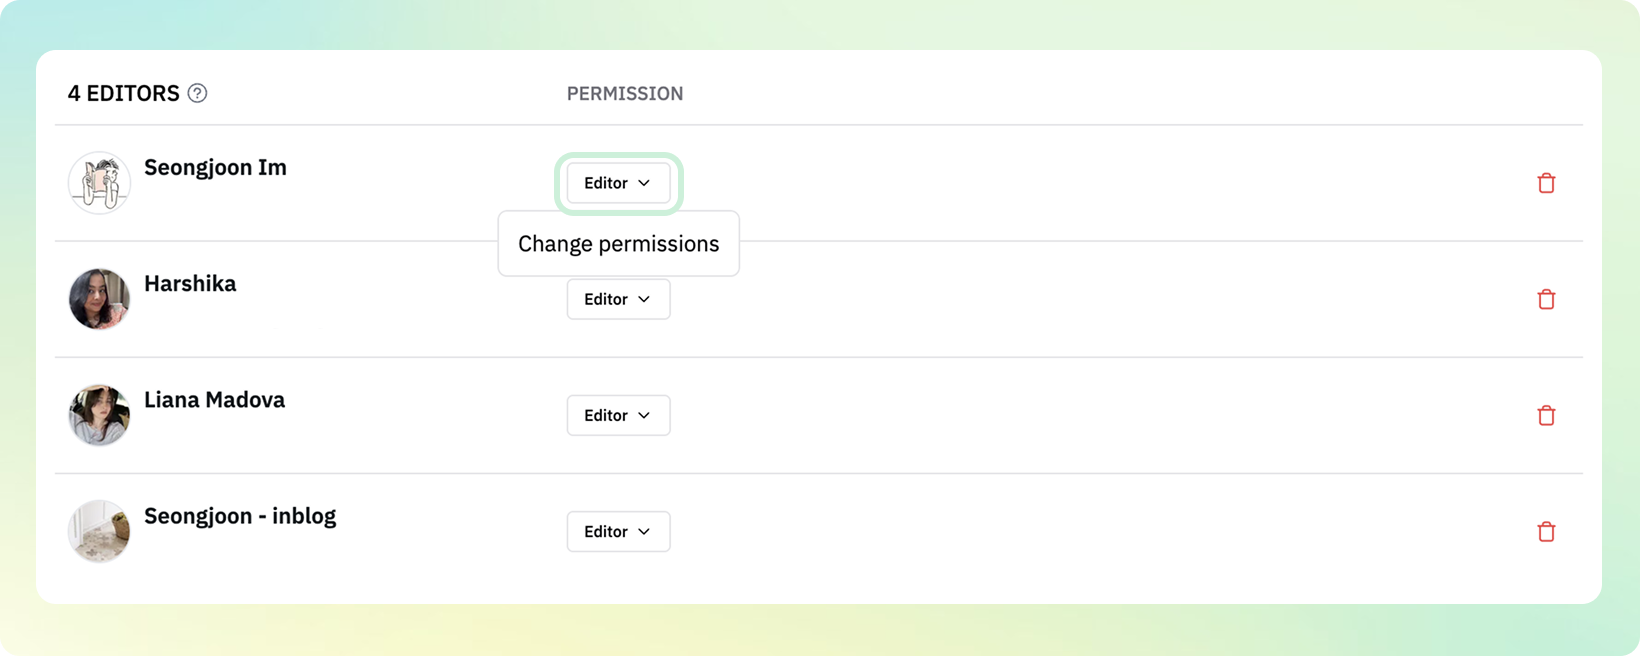
You can update a team member's role from the Permissions section by opening the role menu, clicking Change permissions, and selecting the new role in the dialog.
Only Owners and Admins can change permissions, and neither can change the Owner's role or their own.
Transferring Ownership
You can hand the blog over to another team member.
- Sign in with the Owner account.
- Make sure the person has already accepted their invitation. Someone still listed under Invited can't receive ownership yet.
- Check that their current role is Editor or Author. You can't transfer ownership straight to an Admin — Owner still appears in the role list, but the transfer fails at the confirmation step, so change that member to Editor first. (Once the transfer is done, the new Owner can set the roles back up as needed.)
- Open Change permissions on their row, select Owner, and confirm with the Move ownership to <their email> button.
Only the Owner account can transfer ownership. Admin accounts don't even see Owner in the role list. If you no longer have access to the Owner account, reach out over chat.
Since a blog has exactly one Owner, the previous Owner becomes an Editor once the transfer completes. If they should keep handling billing or team members, the new Owner can grant them the Admin role again.
Author Access Control
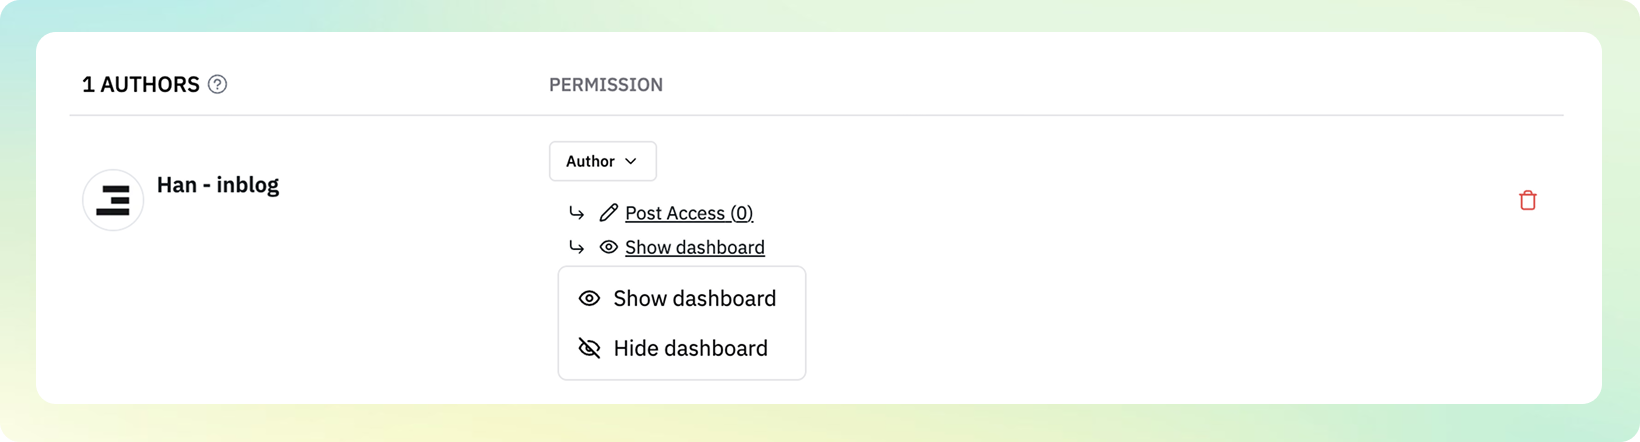
For Authors, you can assign access to specific posts only from the author row. You can also control whether they can view the blog dashboard and publish posts.
Ideal for working with freelance content editors.
Last updated 2026-10-14