
Setting Up Lead Forms for Individual Posts
Configure in-post lead capture forms with custom placement, success messages, follow-up emails, and internal team notifications.
To manage lead capture forms for individual blog posts: Go to Forms → In-Post Forms from the left sidebar.
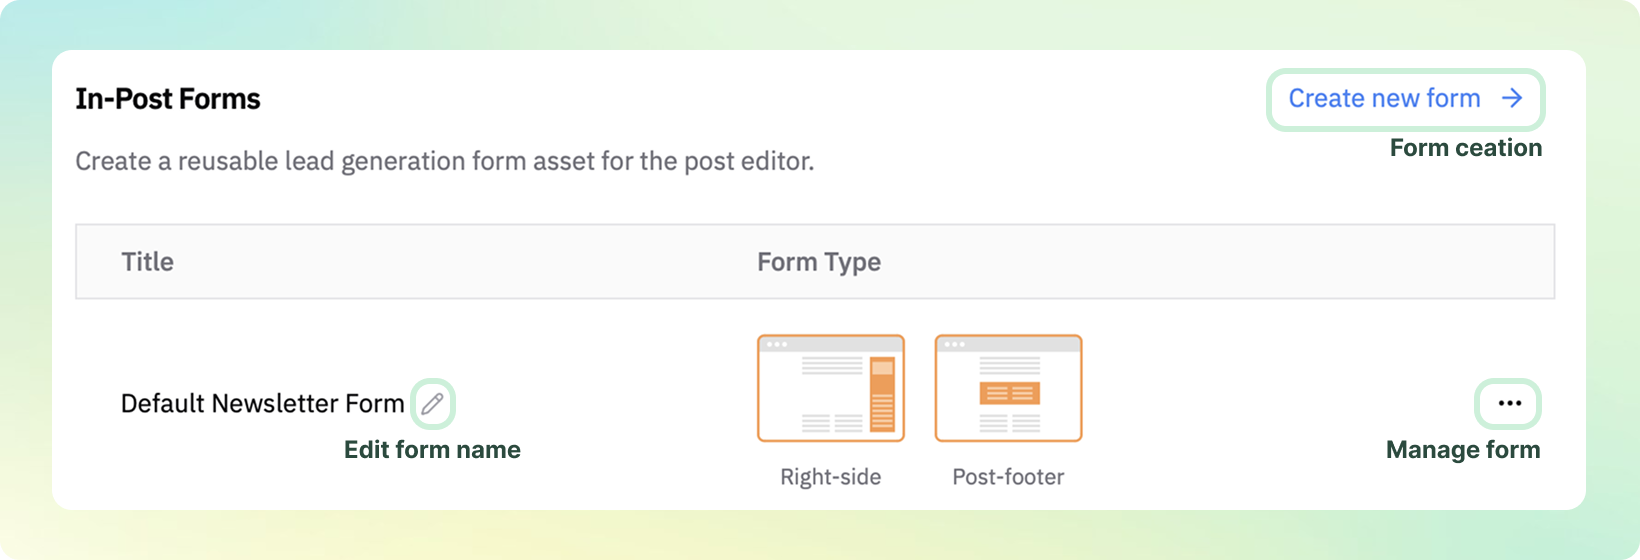
1. Configure the Form
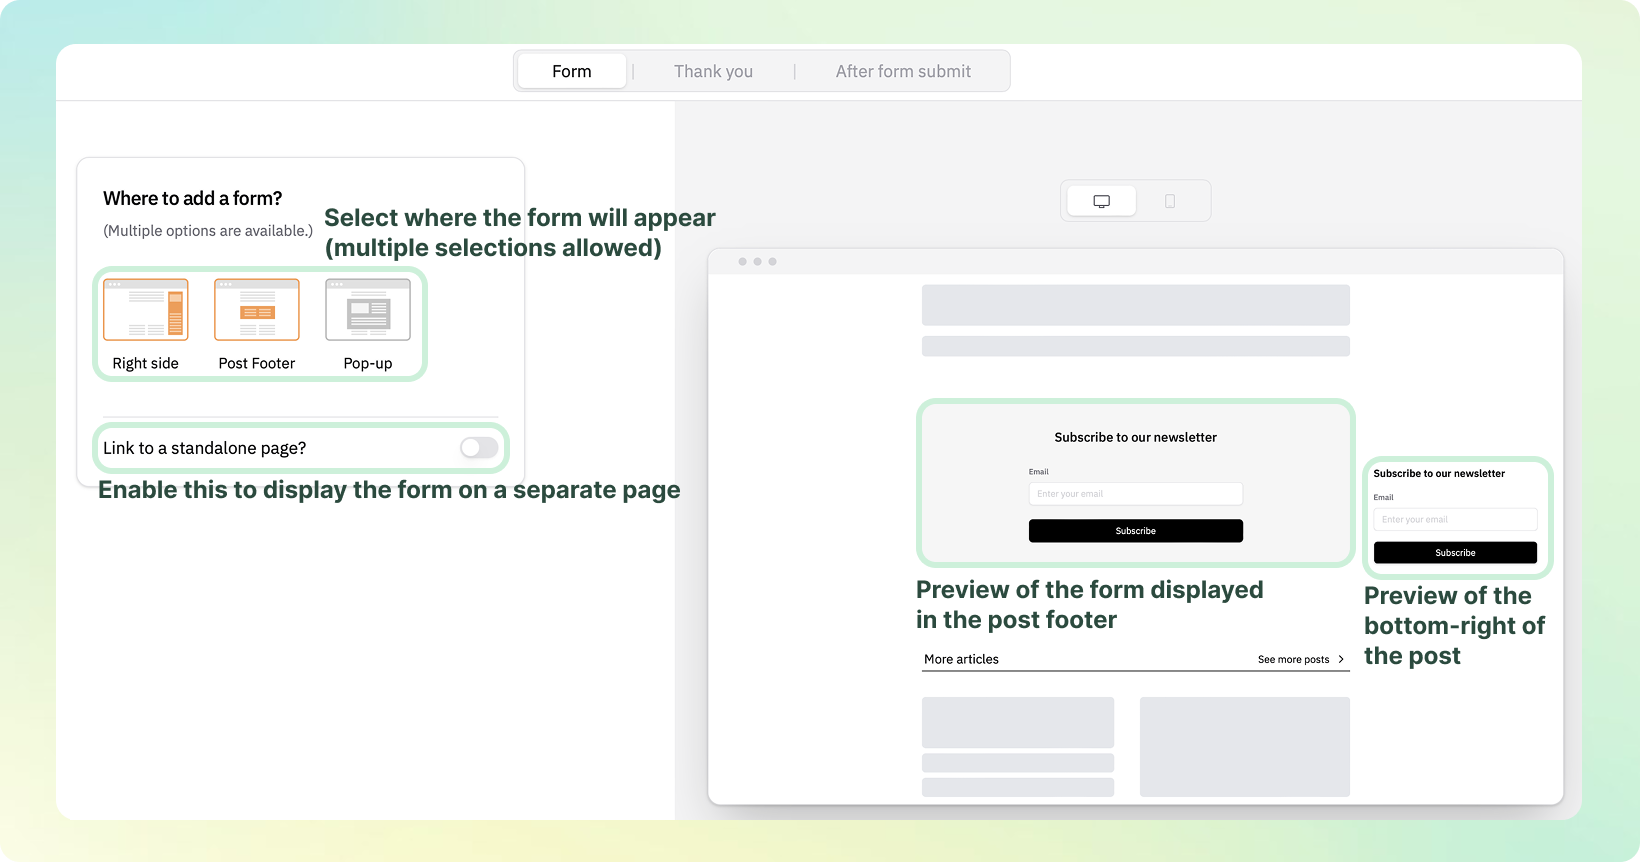
Choose the placement and visibility of the form within a post:
-
Right-side
Display the form below the "More Articles" section in the lower-right corner.
-
Post-footer
Display the form at the very bottom of the blog post.
-
Pop-up
Trigger a pop-up form when the reader scrolls approximately 40% down the page. The threshold is measured against the entire page's scroll height — not the article alone — so a long footer, related posts, or a post-footer form pushes it further into the article.
Want to direct users to a separate form page? Turn on Make this form a standalone page to generate a form landing page.
2. Set the Success Message
Display a custom thank-you or confirmation message after the user submits the form. This works the same as in the Header & Banner forms.
3. Configure Follow-Up Emails
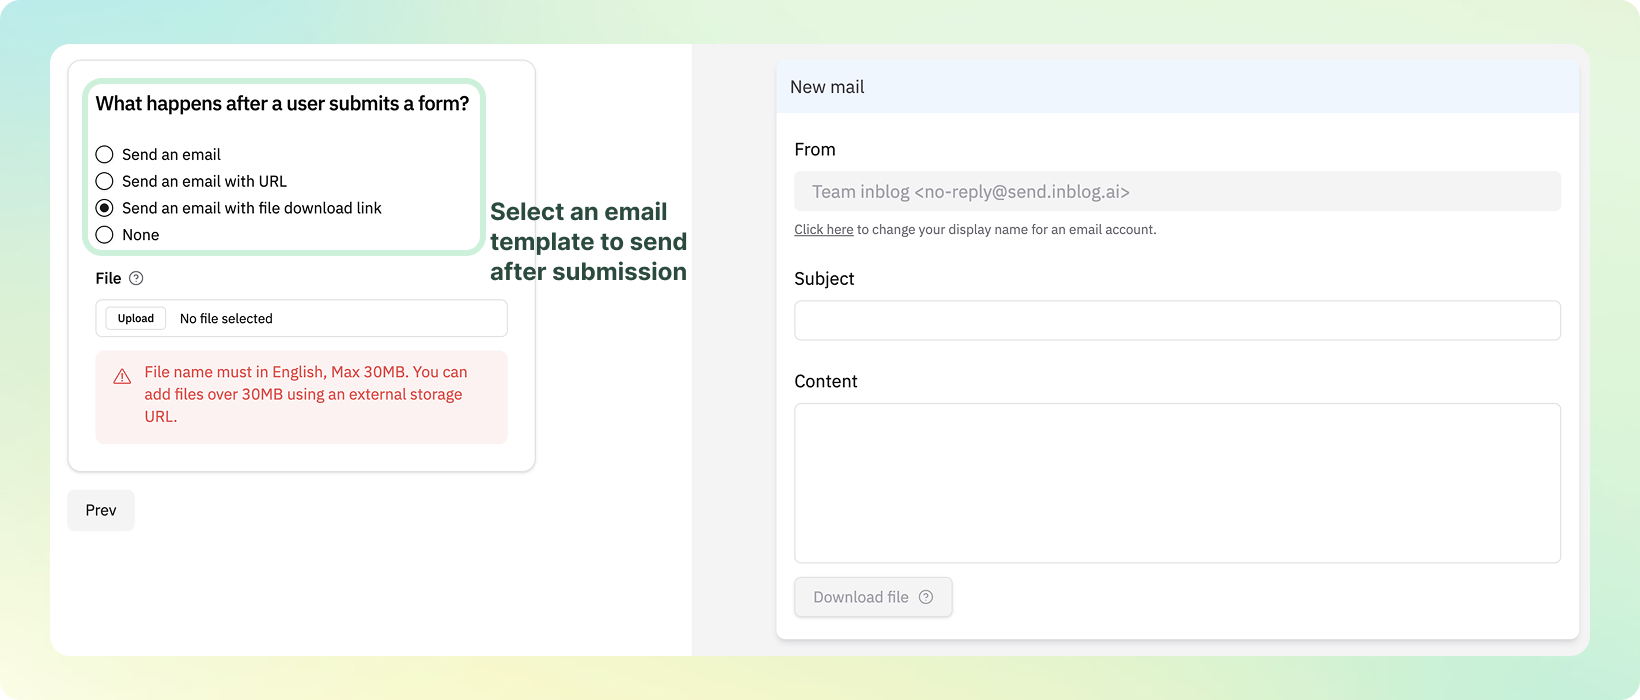
Set up an automatic email response to the user after they submit the form. You can choose from the following options:
-
Send an email only
Deliver a basic follow-up or thank-you message.
-
Send an email with a URL
Include a link (e.g., to a landing page or resource).
-
Send an email with a downloadable file
Attach a downloadable asset.
File size must not exceed 30MB.
-
None
No follow-up email will be sent.
4. Notify Your Team When a Form Is Submitted
Email the submitter and Notify your team are two separate actions. Configuring the automatic reply to the respondent does not send anything to your admins, so turn on Notify your team if you want to be emailed about new leads.
-
It is on only when at least one recipient is selected. Clearing every checkbox under
Recipientsturns the notification off. The blog owner is selected by default. -
Only members who accepted their invitation appear as recipients. Members with the Owner, Admin, Editor, or Author role show up once their invitation has been accepted.
-
The setting is saved per form. Turning it on for one in-post form does not apply it to other forms or to the header and main banner forms — configure each form you use.
-
Notifications start with submissions received after you save. They are not sent retroactively for submissions that already came in.
Use Submitted fields to send either All submitted fields or only the fields you pick.
Leads Are Recorded but No Notification Email Arrives
If submissions show up on the Leads tab but no email is delivered, check the following in order.
- The
Notify your teamrecipients are selected on the exact form that received the submission. - The person who should receive it is checked in the recipient list (members who have not accepted their invitation do not appear there).
- You made a new test submission after saving the setting — submissions received before the save are not covered.
- The recipient's spam and promotions folders.
If notifications still do not arrive after all of the above, send us the form URL and the time of your test submission.
Can a button in the post body open the form as a pop-up?
No. The pop-up opens on scroll only. The Pop-up placement appears automatically once the reader scrolls far enough down the page; there is no setting that opens it from a button or link you place in the post body.
- Once a visitor closes the pop-up, it does not reappear for the rest of that page view.
- Checking
Don't show againin the pop-up hides it for 24 hours.
When Make this form a standalone page is on, all three placements (Right-side, Post-footer, Pop-up) hide the input fields and show only the button, and that button opens the form page in a new tab. There is no setting to open it in the same tab.
After submitting on the form page, a completion message appears and the fields are cleared, but the page stays open. The visitor is not returned to the post, and the new tab does not close by itself — they have to close it. If you want to avoid the page change entirely, use the approach below.
Collecting the form inside the post, with no page change
Embedding the form page in an iframe lets visitors fill it in without leaving the article.
- In the form editor, turn on
Make this form a standalone pageand save. (The form page URL is only generated after saving.) - Open the
Form pagestep — theUse externallypanel appears at the top. - Click
Copy iframe code. (Copy form URLcopies only the address.) - In the post editor, type
/→ choose the Html Code Block and paste the<iframe ...>snippet.
What is an iframe? It is a frame that displays another web page inside your current post. Embedding the form page this way lets readers fill in the form without ever leaving the article.
You can also paste the URL from Copy form URL into a Link button block in the body, but that still opens the form page in a new tab.
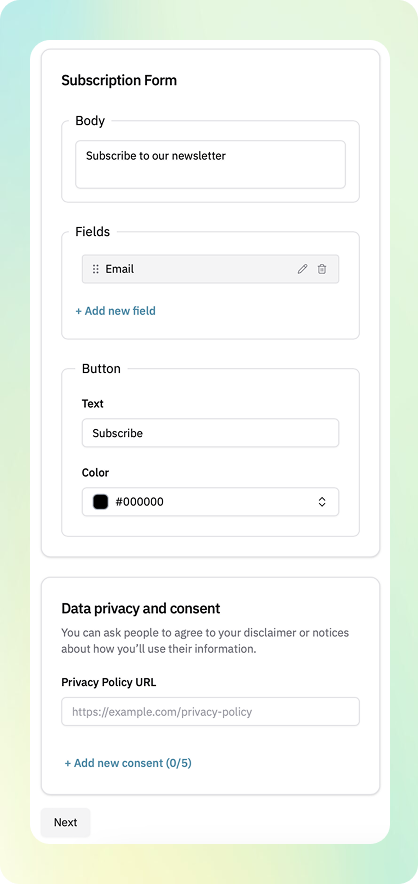
You can customize form content and fields similarly to how you configure the Header Form, including questions, input types, and privacy policy links.
Last updated 2026-08-27